Park Assist
The Problem
After I changed my car from a short Fiat 500 to a longer sedan, we had to peep over the hood and creep into the garage to be able to close the garage door. In fairness, we did get used to it pretty quickly and could park just fine, but hey, an engineer needs very little reason to work on fun weekend projects.
The Vision
I wanted to build a bot that:
- Turns on automatically when I open the garage door
- Guides me to just the right parking distance
- Looks visually appealing and intuitive to read
- Uses minimal energy and no ugly wall warts
- Stays cheap to build
Key Features
Power Parasite Design
I really wanted to avoid using a wall wart. Turns out the garage door opener sends 12V DC to power the infrared safety beam sensors. Perfect! I tapped into this to power both the brains and interrupt circuitry.
Sleepy Bot Architecture
The Arduino sleeps all day and only wakes up when the garage door opens. I use a powerful magnet on the garage door that travels past a reed switch, sending a pulse to ‘Interrupt 0’ (Digital Pin 2) to wake up the bot.
PAPI-Inspired Visual Guide
This was inspired by PAPI (Precision Approach Path Indicator)—a visual aid that helps pilots maintain the correct approach to an airport. As a huge MS Flight Sim fan, I loved the simplicity and intuitive design. I used a 10-bar LED display to mimic PAPI, with green LEDs flashing when you’ve reached optimal distance.
Smart Proximity Warnings
Too close to the wall? The green LEDs flash faster and faster as a warning.
Hardware-Based Distance Adjustment
New car? Need to change the parking distance? No reprogramming needed! Just park where you want, twist a screwdriver to adjust a resistor until the green LEDs flash, and you’re done.
Hardware List
- Arduino Nano V3 5V - Chinese knockoff from eBay Warning: Uses CH340G USB chipset, required some finagling on Mac
- Honeywell Reed Switch - From Amazon
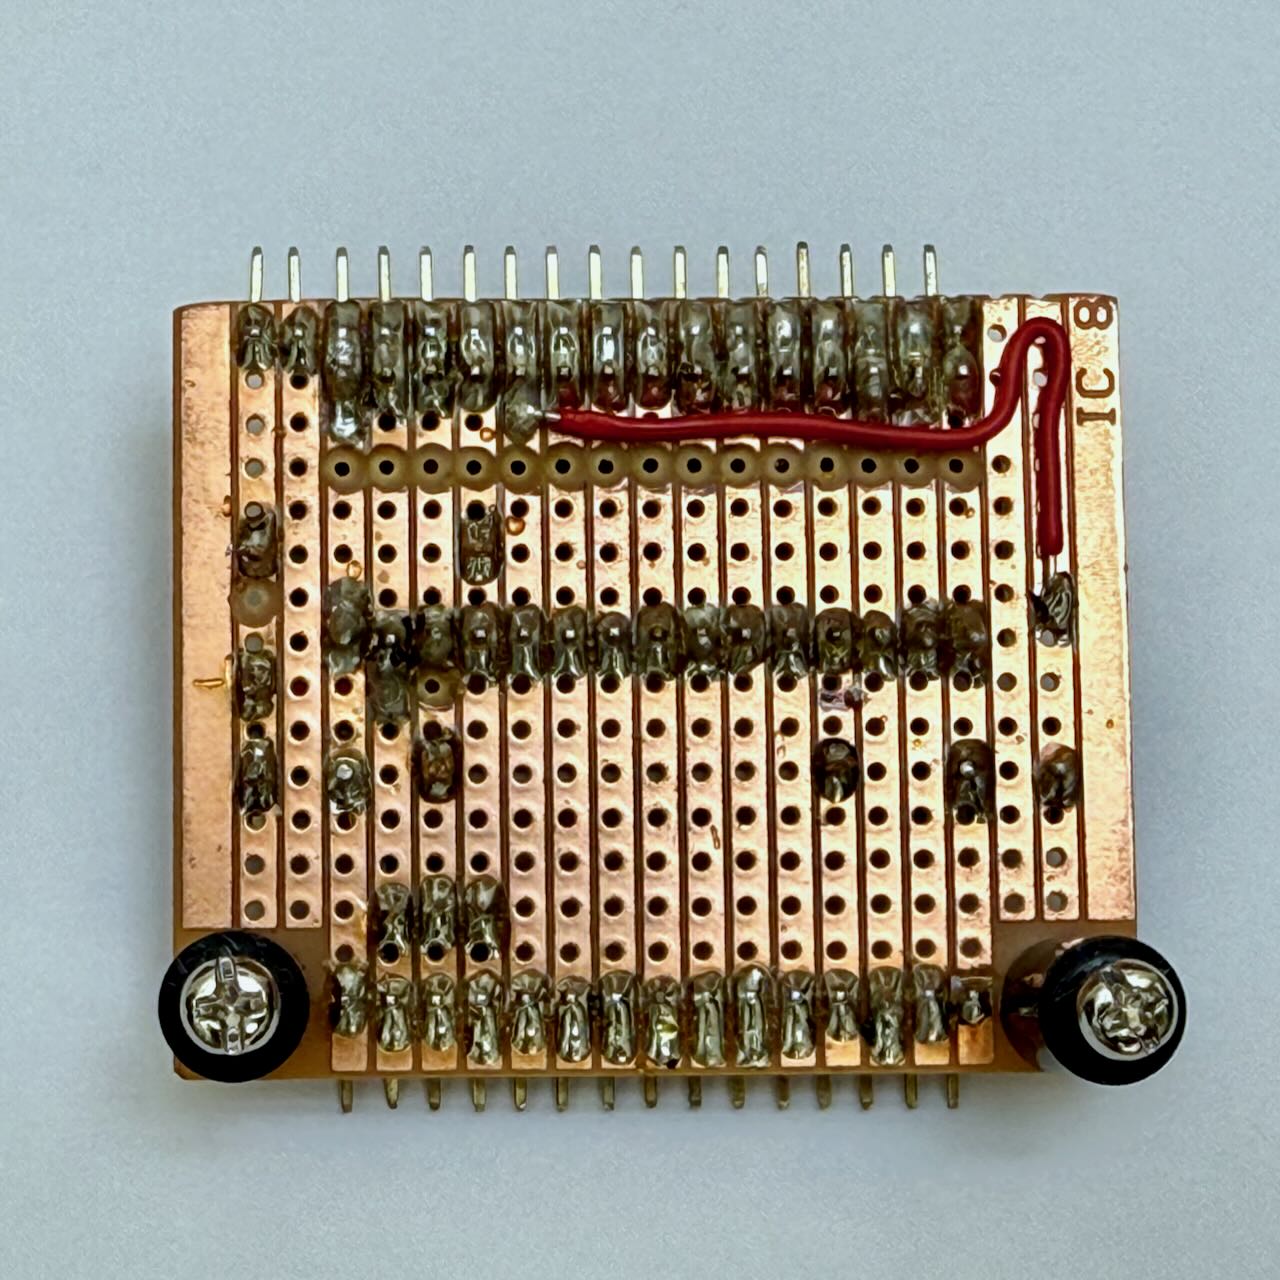
- 10-Bar Red LED Display
- Various resistors, capacitors, and connectors - See Fritzing files for details
Project Complexity
Difficulty: 3/10 - Perfect weekend project that took about 4 days total to design, build, and code.
System Design
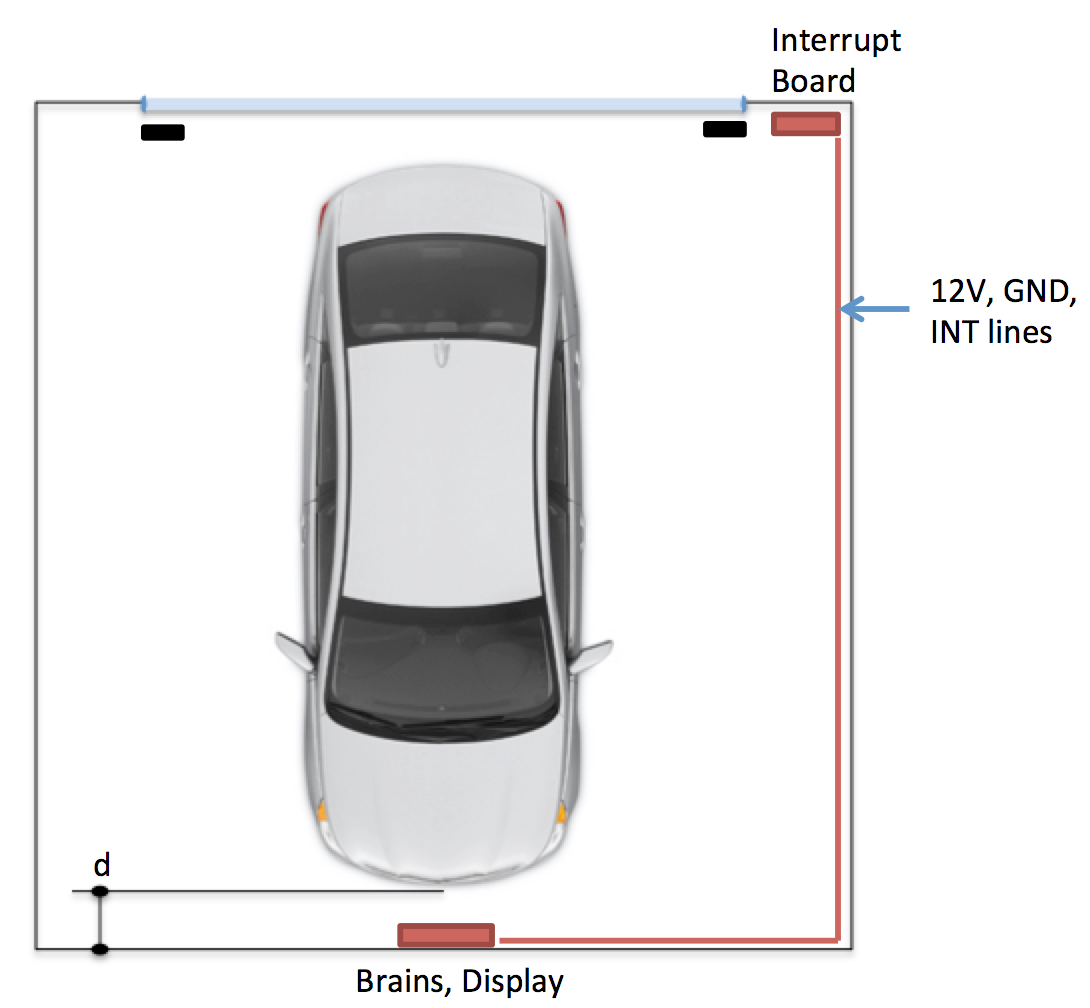
I split the system into three separate boards for optimal placement:
- Brains board - Can be placed anywhere convenient
- Visual display - Mounted high for visibility from the car
- Sensor board - Positioned low, aligned with the car’s front bumper
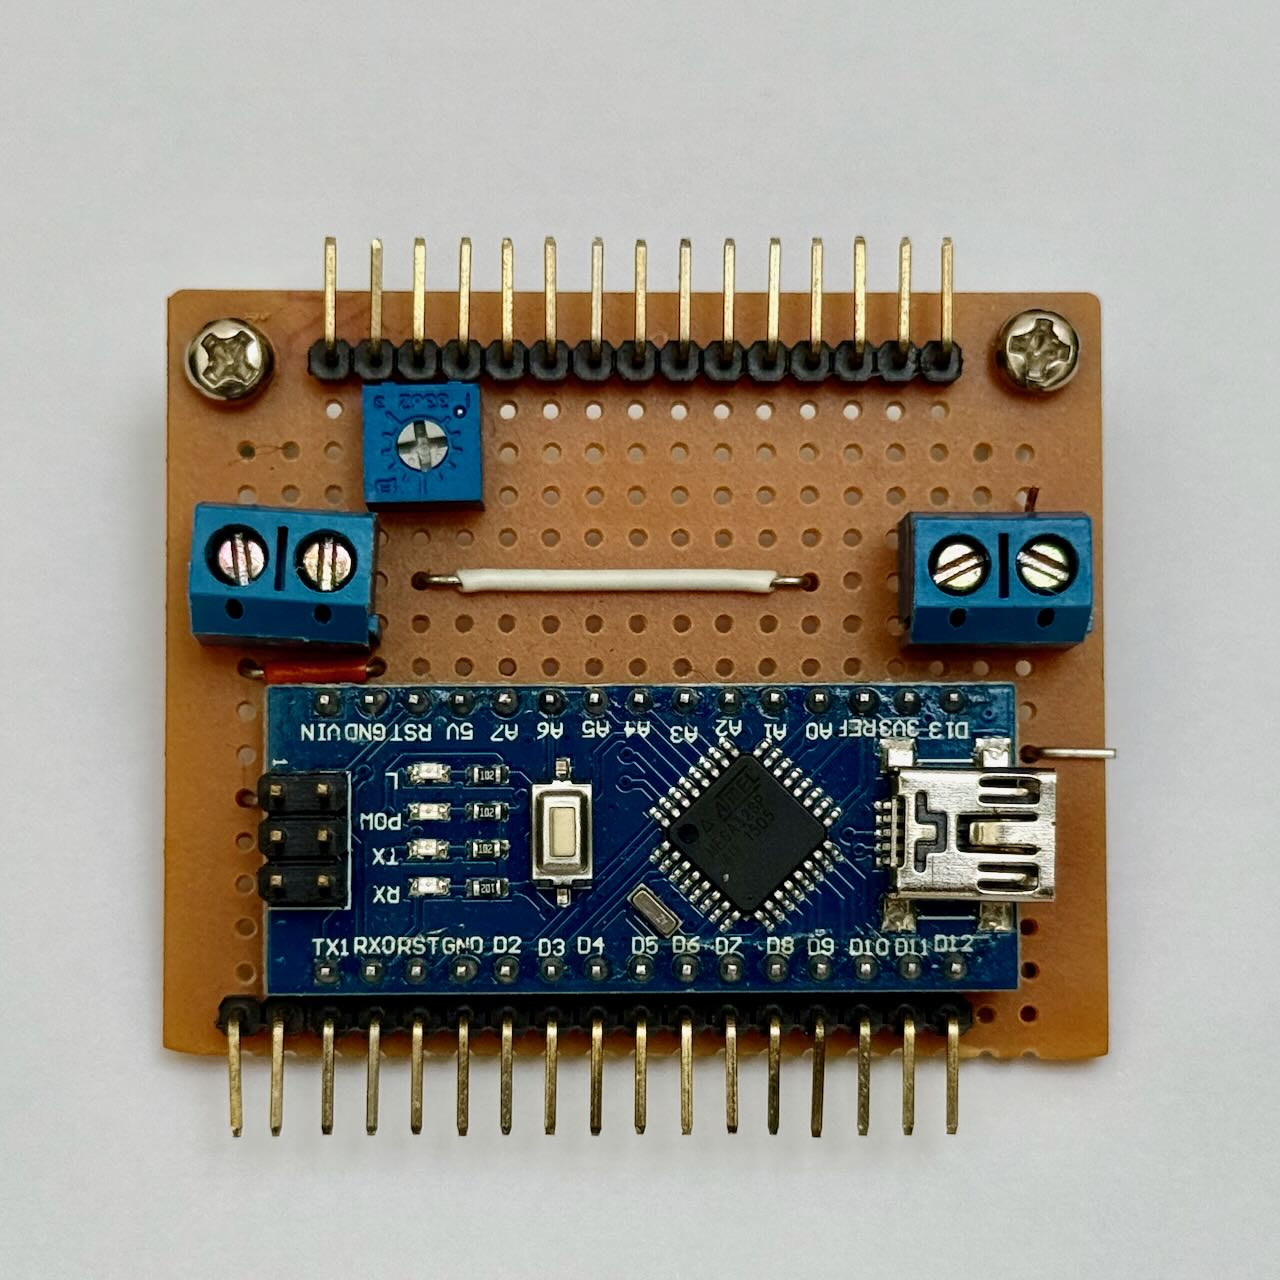
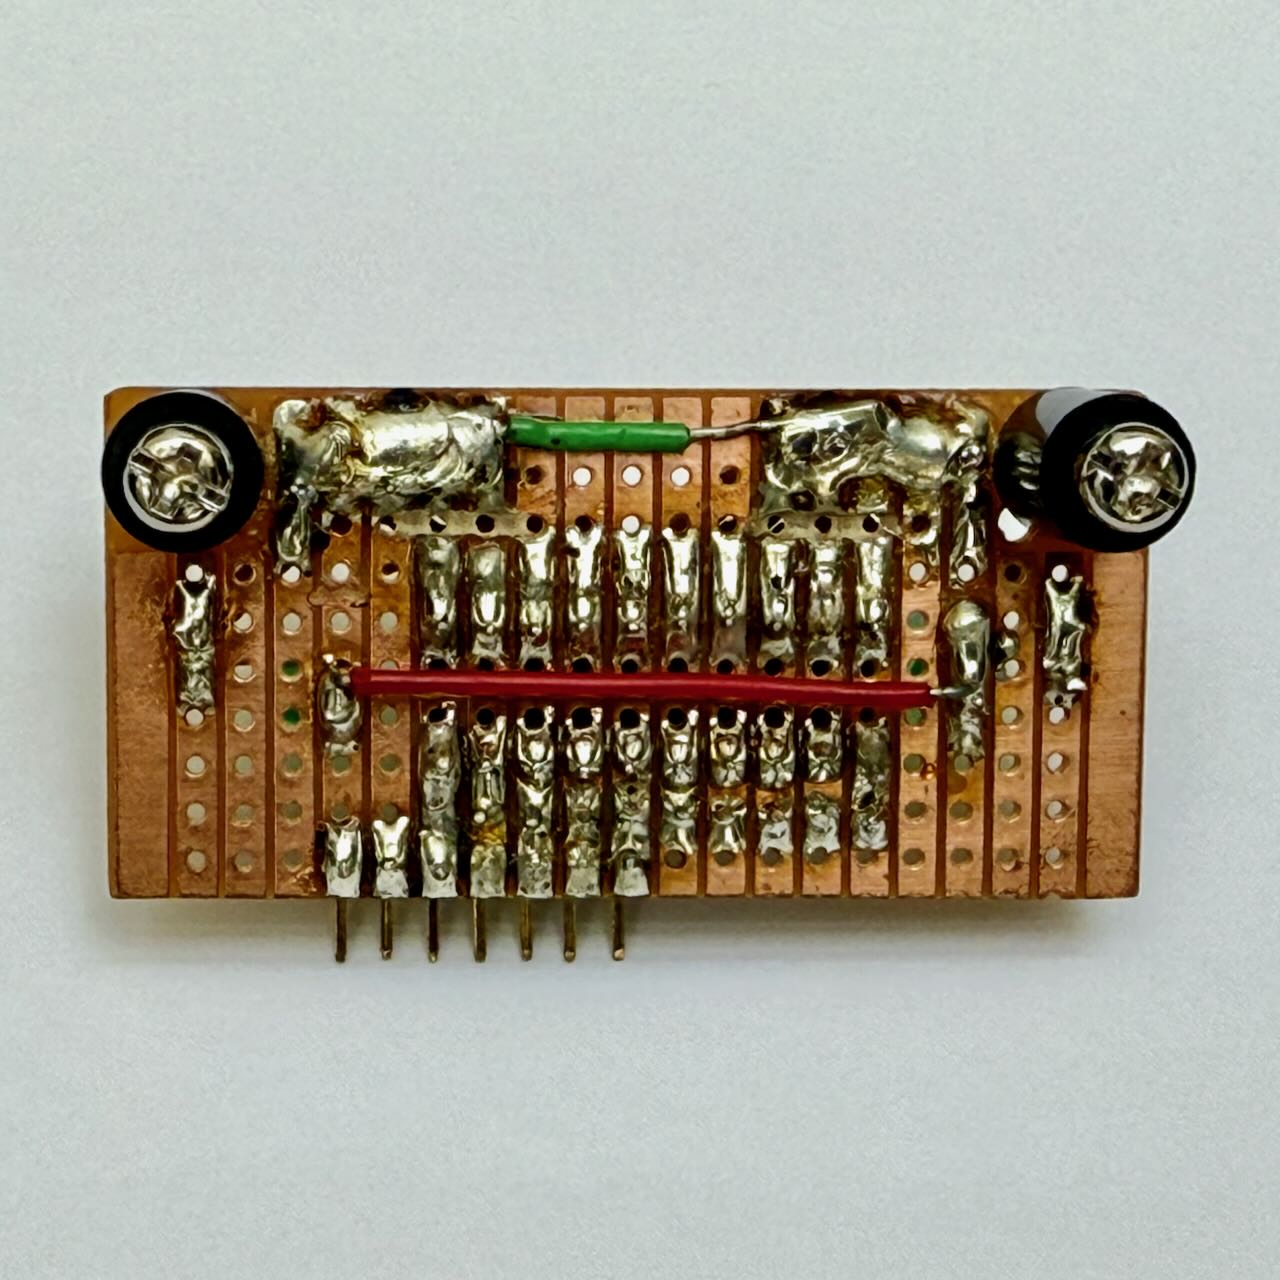
Step 1: The Brains Board
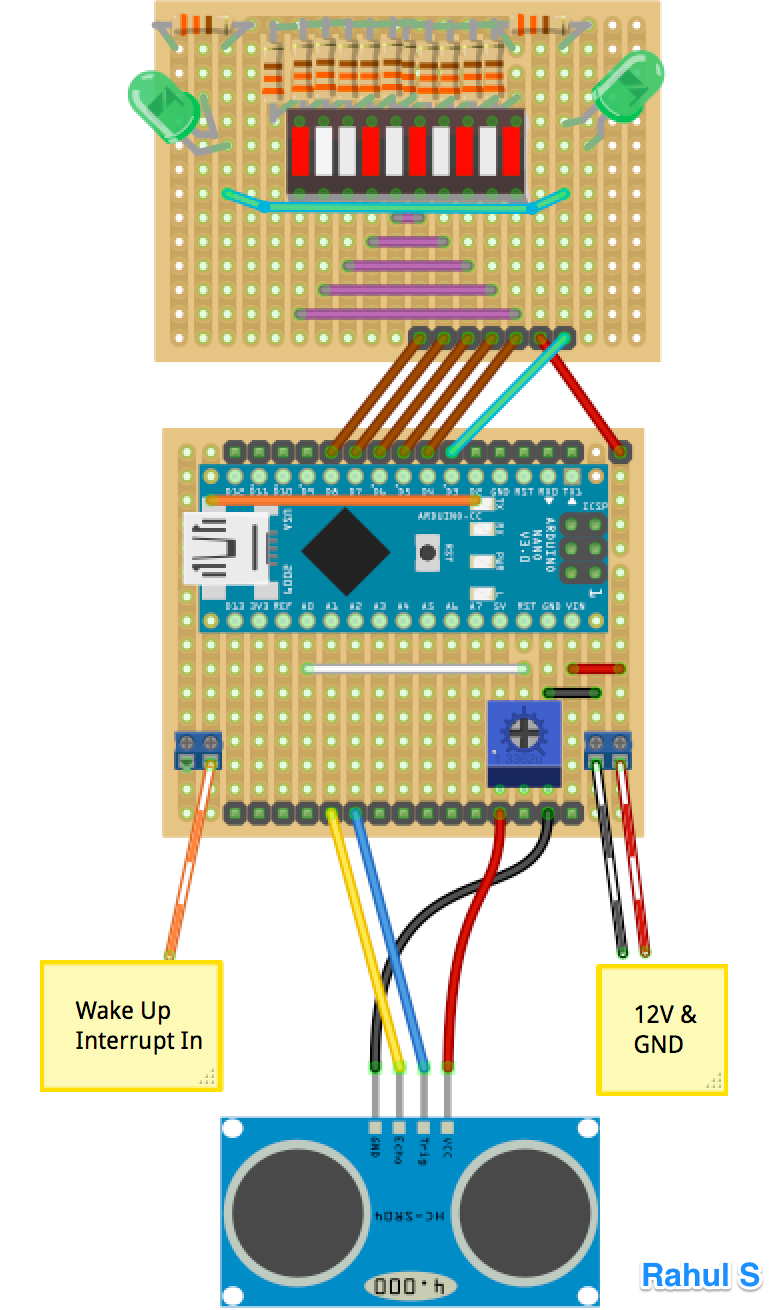
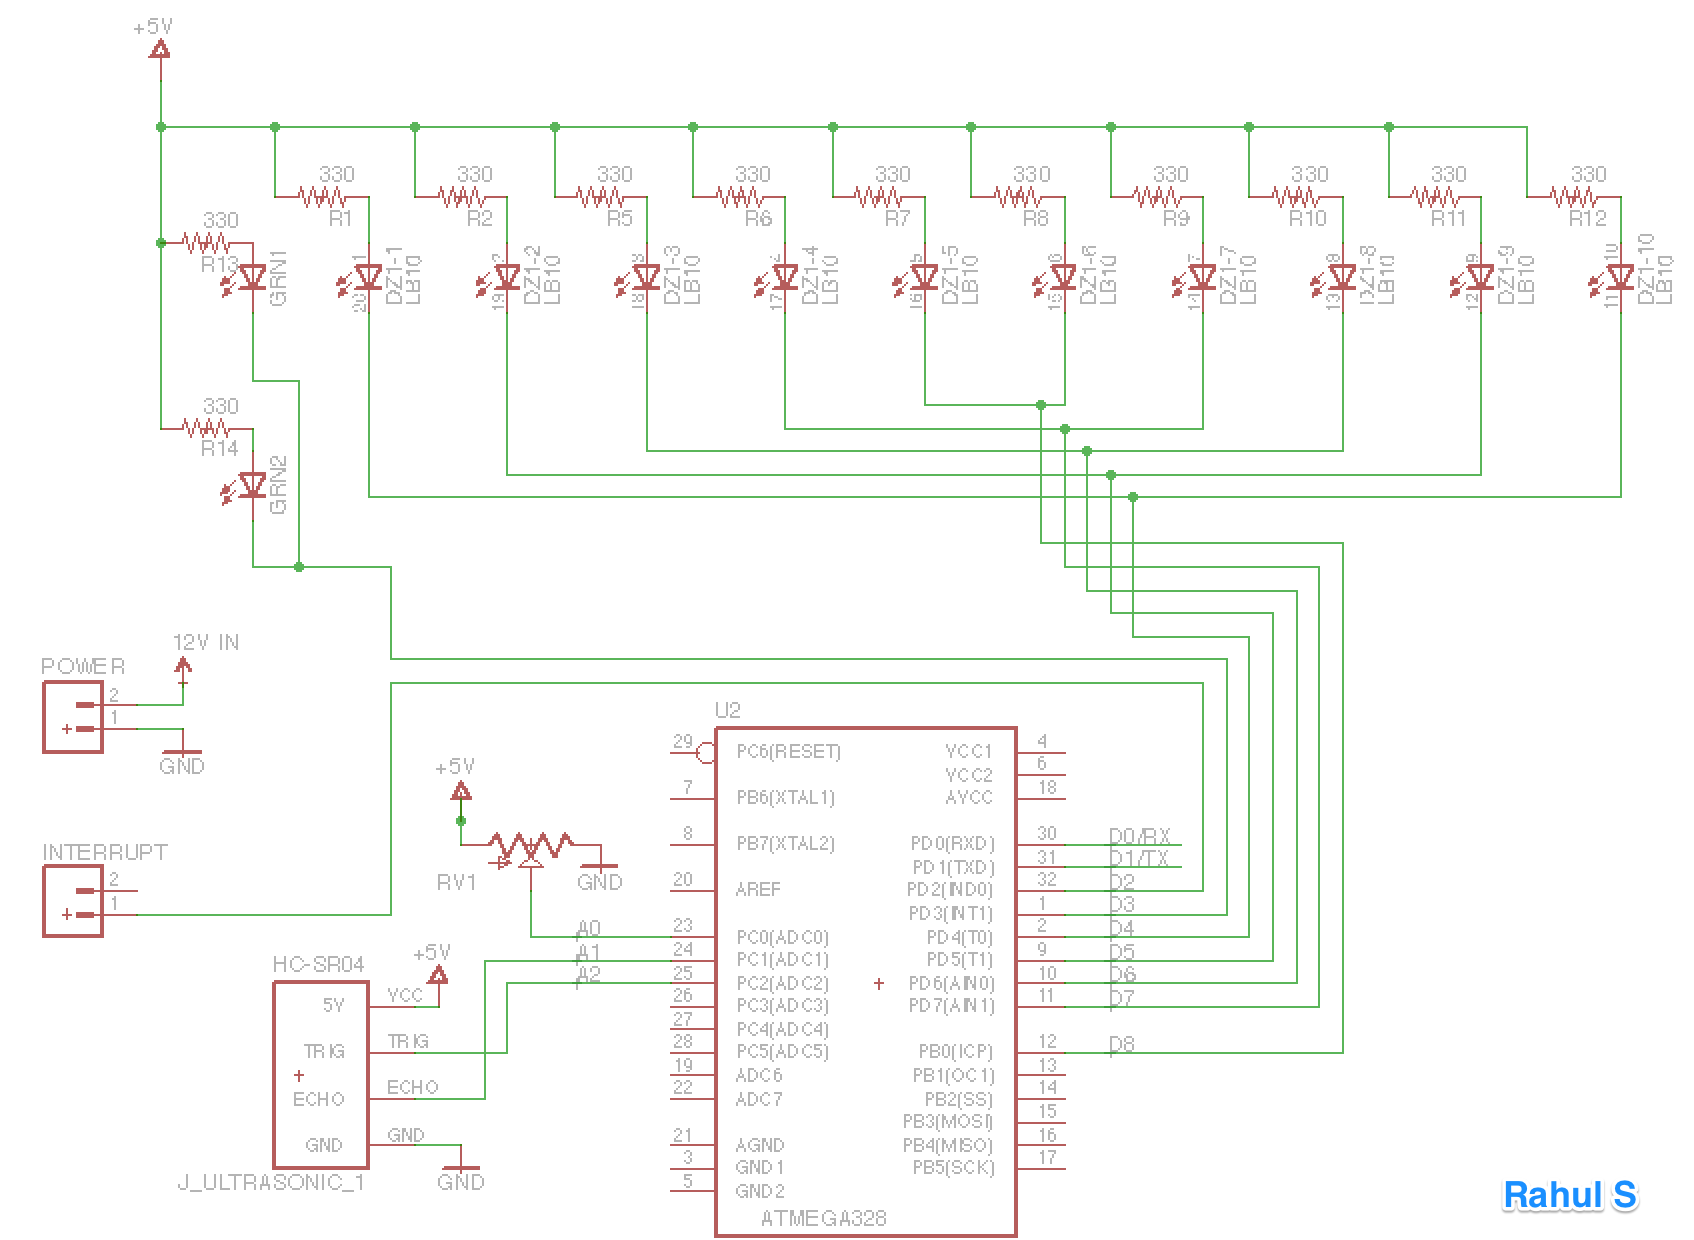
Schematic Design
The schematic shows all connections to the Arduino Nano. Fritzing is a fantastic tool for layout design—my final product looks almost exactly like the simulation.

Step 2: Interrupt Circuitry
Power and Wake-Up System
The 12V from the garage door safety beam provides perfect power. I use 2-pin jumpers to:
- Send power to the brains
- Route through the reed switch for interrupts
The board uses a diode-capacitor combination where the capacitor helps debounce the switch.


Step 3: The Code
Required Headers
#include <interrupt.h>
#include <avr/io.h>
#include <avr/sleep.h>
Main Functions
setup() - Sets pin modes
loop() - Does four main things:
Distance Control Reading
int sensorValue = analogRead(analogDistControl);
int distMin = map(sensorValue, 0, 1023, 30, 100);
Reads the variable resistor and calculates target minimum distance using
map(). This lets me adjust the parking distance with just a screwdriver!Distance Measurement
long distance = readDist();Calls
readDist()to get current distance to the wall.LED Display Logic
- Max distance capped at
distMax = 250→ callsshowmax() - Distance ≤
minDist→ callsshowmin() - Everything else → activates appropriate number of LEDs
- Max distance capped at
Sleep Management Checks if it’s time to sleep by comparing current
millis()withSLEEPDELAY.
Key Functions
readDist() - Returns average of 10 readings (configurable via numReadings). Max distance hard-coded to 250cm.
showmin() - Accepts float ‘d’ (ratio of distance to distMin). As the car gets closer beyond safe distance, ‘d’ gets smaller and green LEDs flash faster. Drama! 🎭
showmax() - Simply indicates the car is still out of range.
Step 4: Implementation
The final system looks clean and professional. All boards are designed to be as visually appealing as possible, and I think it turned out really well!
Get the Code
Complete project files available on GitHub: Arduino Park Assist Project
Includes: - Working Arduino code - Fritzing design files - Eagle PCB files - Assembly instructions
Project Gallery